Search This Blog

Wednesday, November 21, 2012

Lo-Carb Cheese Beer Soup

I've seen several recipes for Cheese Beer Soup lately, and I thought they sounded good.  When I looked one up, it was 20nC  per serving!  Oh, my! I played around with a few recipes and came up with one that is a little under 8nC.  Yay!


Lo-Carb Cheese Beer Soup
Serves 10 @ 7.9nC each

Ingredients:
1.5 cups of diced carrots
1.5 cups of chopped onion
1.5 cups of chopped celery
2 cloves of garlic, minced
hot pepper sauce, to taste
salt
pepper
2 cans of chicken broth
2 cups of beer
1/3 cup butter
guar gum
2 cups of heavy cream
2 cups of water
4 cups of sharp cheddar (shredded)
1 TBS brown mustard
1 tsp dry mustard
6 slices of bacon--cooked and crumbled

In a large soup pot, combine the first 9 ingredients.  (Stop at the butter--you'll need it for the next step.)  Bring the veggies, broth, and beer to a simmer and cook until the veggies are soft.  

In a saucepan, melt the butter and whisk in the water and cream.  Sprinkle guar gum over the cream sauce (not too much or it gels instead of thickening).  You'll need to keep stirring and testing for thickness.  When the white sauce is almost as thick as you want it to be, stir in the cheese.  

Once the cheese is melted (and the veggies in the other soup pot are soft), pour the cheese sauce into the veggie concoction and combine well.        

Serve with bacon crumbles on top.  Each serving will be about 1.5 cups.

Notes: I do not like beer.  I did not like this soup.  My son likes beer--he LOVED the soup.  I shared some with my neighbor (who is a chef and owns a restaurant).  He liked it.  I will make it again for my son, but one batch will last him a little while.

If you're like me, and enter your food into fitday or fatsecret, the nutritional value table is below.


Nutrition Facts

  10 Servings

Amount Per Serving
  Calories 475.1
  Total Fat 40.5 g
      Saturated Fat 25.3 g
      Polyunsaturated Fat 2.0 g
      Monounsaturated Fat 12.1 g
  Cholesterol 139.8 mg
  Sodium 902.5 mg
  Potassium 442.3 mg
  Total Carbohydrate 9.2 g
      Dietary Fiber 1.3 g
      Sugars 1.3 g
  Protein 14.7 g

  Vitamin A 74.0 %
  Vitamin B-12 11.5 %
  Vitamin B-6 8.8 %
  Vitamin C 7.3 %
  Vitamin D 8.6 %
  Vitamin E 3.9 %
  Calcium 39.0 %
  Copper 8.7 %
  Folate 8.0 %
  Iron 5.9 %
  Magnesium 7.7 %
  Manganese 15.0 %
  Niacin 14.7 %
  Pantothenic Acid     5.0 %
  Phosphorus     37.0 %
  Riboflavin 18.4 %
  Selenium 13.9 %
  Thiamin 4.3 %
  Zinc 13.8 %


*Percent Daily Values are based on a 2,000 calorie diet. Your daily values may be higher or lower depending on your calorie needs.


SparkPeople RecipeCalculator


Pumpkin Custard

I have never been a huge fan of pumpkin pie.  If I'm going to spend the carbs on sweets, I want pecan pie. Thanks to Linda, I can enjoy the taste of pumpkin pie without spending a lot of carbs!  Since I love custard, but only have a taste for pumpkin pie at Thanksgiving, I think this is a great choice for me.  The recipe is Linda's, but the pictures are mine. 


Pumpkin Custard
Makes 8 servings @ 5nC each
Please click on the link for ingredients and instructions.

I like to assemble my ingredients first.  That way, there are no rude surprises as I put things into the bowl.  Here are the ingredients required for Linda's Pumpkin Custard:


The recipe calls for you to mix the ingredients in the order given.  That's what I did--except for the salt, which I forgot.  I had to mix it in last.  I didn't want to spend the time looking for nutmeg (it was not in its place--alphabetical order), so I used McCormick's Pumpkin Pie Spice.  Since I really like cinnamon on my custard, I added a little extra cinnamon. 

Here is the custard--ready to go into the oven.  It will bake at 350*F for 45-55 minutes.  I'm using a square pan since my oven is still broken.  The toaster oven has worked well for me this holiday season--as long as I have small enough baking pans.  If my wall oven was working, I'd probably make this in individual cups--like I do my regular custard.


I put the custard in the oven about 10 minutes ago and the aroma is already heavenly!  Who needs air fresheners during baking season?


Finished product...can't wait to dig in, but I'm going to wait until tomorrow.  Come on, will power!


Here is the nutritional value given on genaw.com:
With granular Splenda:
Per Serving: 97 Calories; 7g Fat; 2g Protein; 7g Carbohydrate; 2g Dietary Fiber; 5g Net Carbs
With whipped cream: 200 Calories; 18g Fat; 3g Protein; 8g Carbohydrate; 2g Dietary Fiber; 6g Net Carbs


With liquid Splenda:
Per Serving: 91 Calories; 7g Fat; 2g Protein; 5g Carbohydrate; 2g Dietary Fiber; 3g Net Carbs
With whipped cream: 194 Calories; 18g Fat; 3g Protein; 6g Carbohydrate; 2g Dietary Fiber; 4g Net Carbs 


Tuesday, November 20, 2012

Low-Carb Pecan Pie

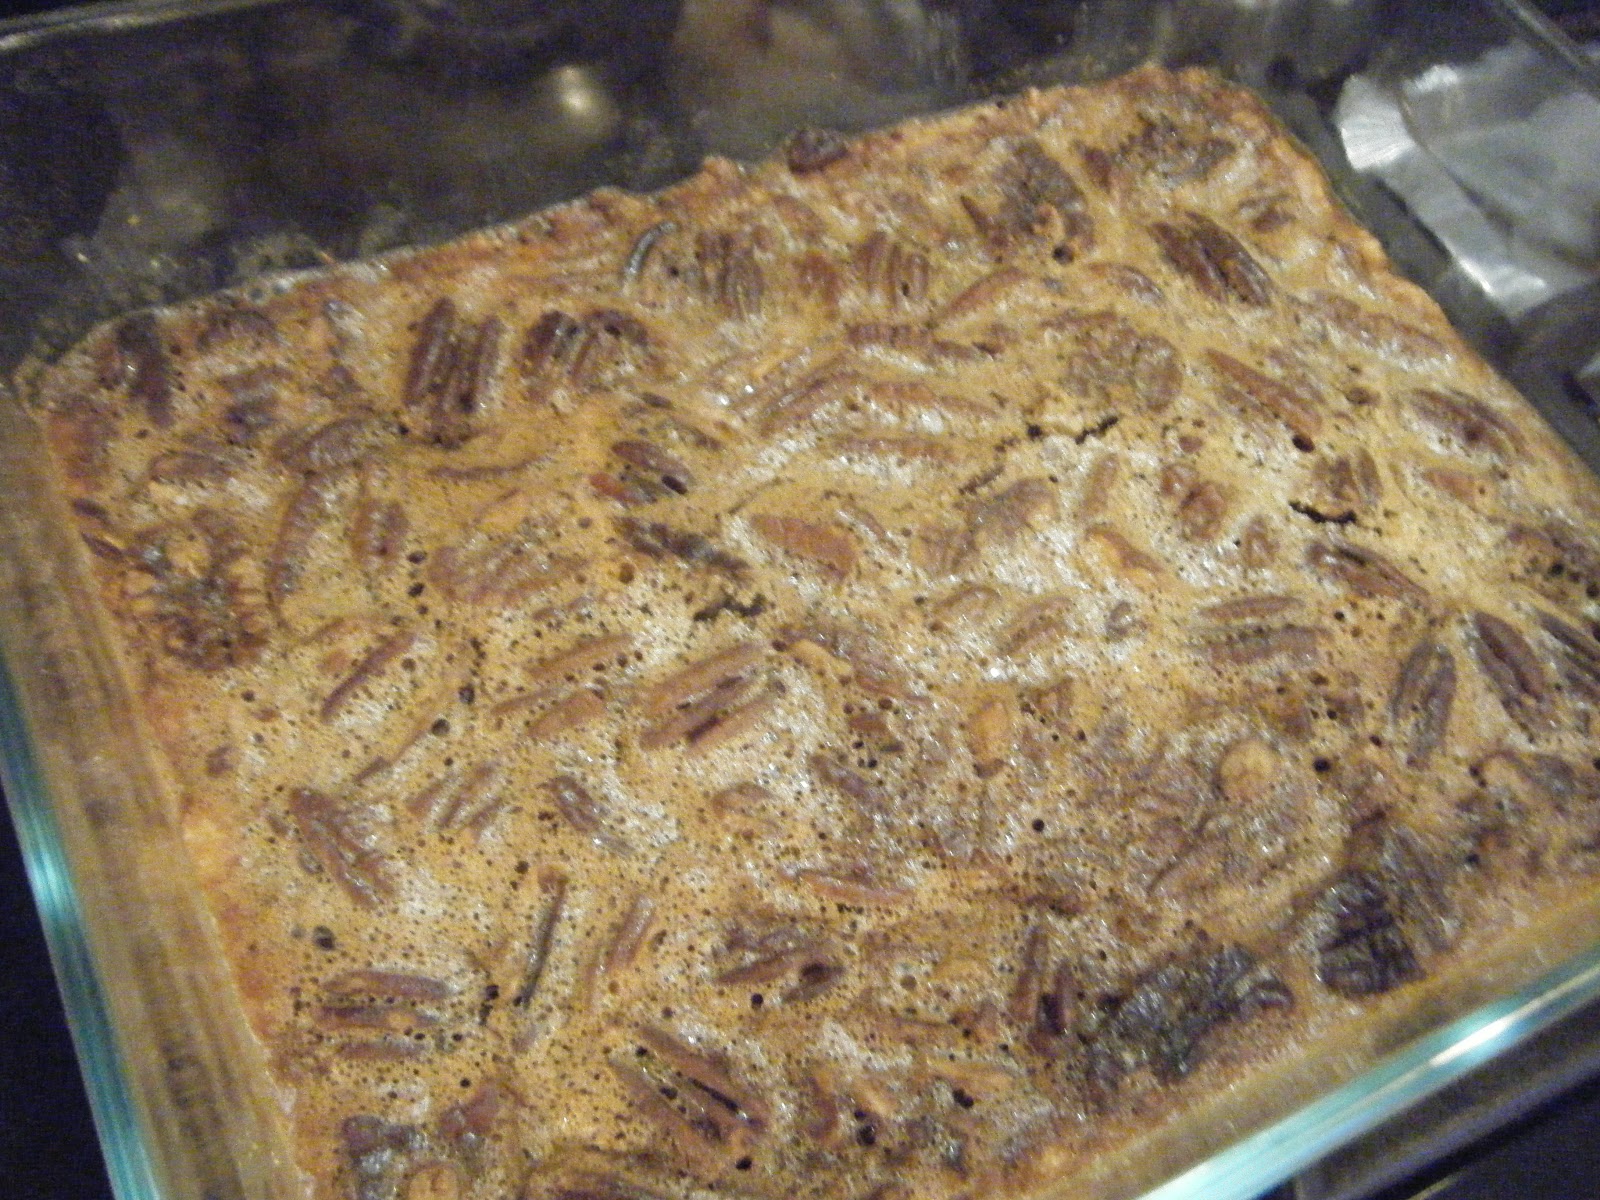
One of my favorite desserts (any time of year) is Pecan Pie.  I can rarely eat it, though, because it is so sweet.  If I decide to have a piece on Thanksgiving, I limit it to 1/2 a slice.  This year, someone shared a recipe for low carb pecan pie--and I am ALL over it!


If you're not familiar with the blog, Life with Lisa, I'm posting the link here.  I used her recipe--exactly--except that I backed my pie in a rectangular dish that fits in my toaster oven (my 'real' oven is still broken).

Lisa's Mom's Low-Carb Pecan Pie

Here is my crust (note the rectangular dish), the filling, and the pecans.  I have three steps left: 1) dump the pecans into the filling, 2) dump the filling/pecans into the crust, and 3) bake for 45 minutes at 350*F.


Here is my Pecan Pie--ready to go into the toaster oven.  Whoo-hoo!


I am only 10 minutes into the baking step--and the kitchen smells like heaven!


Finished product!

Notes:
Next time, I will bake the crust before pouring in the filling.

It's Thanksgiving...time for turkey and dressing!

It's been quite a while since I posted, but life has slowed down enough for me to get into the kitchen and try something new.  It's Thanksgiving week, so I decided to low-carb my granny's recipe for cornbread dressing.  As is my wont, I'll post the original recipe before I post the low-carbed version.

Granny's Cornbread Dressing
Serves: 25 (27.6 nC/serving)

Preheat the oven to 350*F.

Ingredients:
2 large rectangular pans of cornbread, toasted & cubed
8 slices of white bread, toasted & cubed
4 cups of chopped white or yellow onions
4 cups of chopped celery
4 cups of sliced green onions
4 boiled eggs, chopped
4 raw eggs, slightly beaten
1 "box" of sage
4 cups chicken or turkey broth
1 stick of butter 

Directions:
Put the cornbread cubes and bread cubes in a LARGE bowl.  In a cast iron skillet, melt the butter and saute the yellow onion and celery until the onion is clear. While the onions and celery are cooking, add the chopped boiled eggs and the green onions to the cornbread cubes.  Stir in the raw eggs.  Add the cooked onions and celery.  Stir well (it's OK if your cubes break down a little).  Mix in the sage--yes, the whole box (this makes a boat-load of dressing).  Add enough chicken broth to moisten the dressing--very moist is OK, but you don't want it soupy.  Press the dressing into a couple of greased baking pans and bake at about 350*F until the top is firm--we like it extra 'crunchy' so I use a shallow pan (like a deep-sided cookie sheet).  If you like moist dressing, bake it in a deep pan with less surface area.  This recipe fits quite well in a turkey roaster--and bakes well in one, too.  It's great for large gatherings.

Sometimes, I'm lazy--and I don't need to make dressing for 20-30 people.  I used to make Stouffer's cornbread stuffing (with broth instead of water) and add 1 boiled egg (chopped) and a couple of sliced green onions to the mixture after it was hot--when it sits to absorb the liquid.  Since I am now violently allergic to corn, I no longer cheat--even with Stouffer's.


Sunday, September 16, 2012

Busy, busy, busy!

I have been very busy!  School has started, and I've been going in early so that I am prepared to teach all the little (OK, big) darlings.  Clock-in time is 6:40 and I've been clocking in by 5AM most days...I've been covering the assignments and grades for two vacancies (Algebra II, Pre-Calculus, and MathModels), so I have a lot more to do than prepare for my 5 sections of classes. 

I am avoiding sewing--I still have 2 bridesmaid dresses, 2 ghillie shirts (to go with kilts), and my own mother-of-the-bride dress to make before October 21st.  I'll be out of town for 9 days, in observance of the Biblical Fall holy days, so that takes time away from sewing. 

Relza was pacing the kitchen earlier this morning--at 6:30--telling me that I had dresses to make and needed to get off the computer.  I think she is getting anxious that I won't finish.  She is also anxious because she has an appointment to get her wisdom tooth (maybe teeth) pulled on Tuesday and she HATES needles.  (She hates needles so much that she gave her sewing machine to her future mother-in-law because IT has a needle on it. LOL )

I will post pictures, eventually, of the dresses.  For now, I'm just posting an explanation of why I haven't posted lately.


Monday, August 6, 2012

Chocolate-Peanut Butter Oopsie Cupcakes

Yield: 12 cupcakes, 1.4 net carbs each


If you remember my previous blog, you'll remember that I thought the idea of Oopsies was ridiculous--until I tried them.  Tonight, I'm making them with Torani SF syrup & dehydrated PB.  I used the same recipe last week and it was delicious and decided to share.


You'll need:

4 eggs, separated
1/4 tsp Cream of Tartar
4 oz cream cheese
2 TBS Torani SF Chocolate Syrup
4 packets of Ideal sweetener
2 TBS dehydrated peanut butter (or peanut flour)


What to do:
  1. Preheat the oven to 300*F.
  2. Spray a standard-size 12 cupcake pan with Pam or grease well.
  3. Beat the egg whites with the Cream of Tartar--until it forms stiff peaks.
  4. Beat the egg yolks, cream cheese syrup, sweetener, and peanut butter until smooth.
  5. Gently fold the two mixtures together and mix as well as you can without deflating the egg whites.
  6. Ladle 1/4 cup of the mixture into each of the 12 cupcake wells.
  7. Bake for 30 minutes.  Let sit in the oven for about 10 minutes after turning off the oven.  (Check to make sure that they don't burn.)  


Serve plain, with butter, or with SF jam.  I made some of these in a muffin-top pan last week and added a smear of SF strawberry jam to each one...delicious!  Since I made cupcake/muffin size this time, I'll probably slice them in half horizontally and smear the jam in the middle.  (I've always been a fan of cutting a cupcake in half and putting it back together with the icing in the middle.)


 This brand is 1 nC per TBS.  


Nutrition Facts
  12 Servings

Amount Per Serving
  Calories 62.3
  Total Fat 5.3 g
      Saturated Fat 2.6 g
      Polyunsaturated Fat 0.5 g
      Monounsaturated Fat 1.6 g
  Cholesterol 72.1 mg
  Sodium 52.2 mg
  Potassium 44.9 mg
  Total Carbohydrate 1.6 g
      Dietary Fiber 0.2 g
      Sugars 0.0 g
  Protein 3.3 g

  Vitamin A 4.7 %
  Vitamin B-12 3.3 %
  Vitamin B-6 1.6 %
  Vitamin C 0.0 %
  Vitamin D 3.3 %
  Vitamin E 0.4 %
  Calcium 1.6 %
  Copper 0.1 %
  Folate 2.3 %
  Iron 2.1 %
  Magnesium 0.1 %
  Manganese 0.0 %
  Niacin 0.0 %
  Pantothenic Acid     0.3 %
  Phosphorus     4.3 %
  Riboflavin 4.4 %
  Selenium 0.3 %
  Thiamin 0.1 %
  Zinc 1.7 %


*Percent Daily Values are based on a 2,000 calorie diet. Your daily values may be higher or lower depending on your calorie needs.


Nutritional Info from SparkPeople